Digital sculpture
Week 1 - Anatomy, proportions and the
skull.
Labeled skull

To the left is the labelled images of a male and female skull with the female skull being on the left and the male skull being on the right. The Gonial angle of the jaw can also show which one is male or female with the male having more of a right angle shaped compared to the female which is more curved.

This is a more detailed label of the skull with all the skull parts colour coded with its name.
Introduction to Zbrush

This was my first session on the animation software Zbrush. Throughout this session we got to learn and get familiar with the range of brushes and tools that i would be using in the future. From the image the main tools and brushes that i got to play around with was the standard brush, dam standard brush and the move tool.
Week 2 - Creation of the nose

Creating a nose on Zbrush


The images above convey my first creation of the nose on Zbrush. The standard brush and move tool was mainly used to perform this creation. When smoothing the nose out i also used the smooth brush tool, by simply holding down the shift button and used the divide button tool to ultimately smooth the whole nose out even more.
Improving my created nose on Zbrush

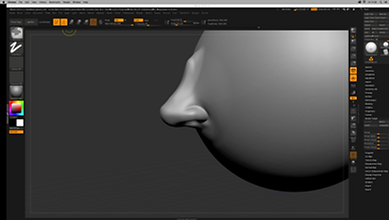
My created nose was then upgraded resulting in more detail to be added to strengthen the realism of the nose. As shown in the images above the fat around the nose is seen to be more dominant when compared to my first nose creation. The nostrils were also wider and the bone bridge of the nose stands out much better than before.
Week 3 - The mouth

Labeled mouth

From the labelled image to the left i have colour-coded all the different parts of the mouth with it names. AN old man was a good choice to choose for this activity as the mouth parts are more prominent such as the marionette lines and the nasolabial furrow due to age.

From this image the baby has more of a heart type shape or a cupid bow shape. The lip divisions are also easier to see as well due it having 2 divisions on the bottom lip and three on the top lip.


Between the male and female images of the mouth most of the features are quite prominent and easy to se. For example both philtrium's can be seen, along with the vermillion submits. In addition when comparing these to image the females vermillion border are bigger than the
males.


As age progresses some features of the mouth begin to slowly disappear and others reaper. An example of this could be marionette lines as these are shown more clearly on an older person compared to someone younger. Furthermore both the vermillion borders have become extremely thin making the overall shape of the most into thin straight line.
Creating a mouth on Zbrush


The images above is my creation of the mouth on Zbrush. Throughout the creation process the main tools that i had to use to create the mouth was the dam standard brush, standard brush, smooth and move tool. The dam standard tool helped me create the mouth philtrium and marionette lines. The rest of the tools were mainly for the lips to give it that greater mouth effect.

Week 4 - The Ear

Labeled ear

The image to my left conveys the ear with each main part of it colour coded with its name.

From each of these images above you can clearly see how the form of the early slowly changes over time as a result of age.
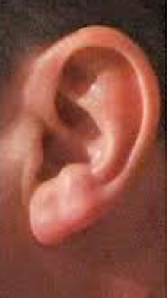
For example the ear in the middle has the most prominent features in the ear as you can clearly see the Helix, the anti-helix and the thick bottom earlobe.

In the next image you can see the the slight change in the ear such as the Helix slightly moving inward and slowly losing that nine shape. In addition the bottom ear lobe is starting to drupe down much more than before.
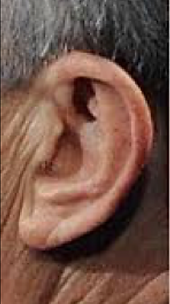
From the final image the prominent features of an ear are much less visible when you compare to the first image. The Superior crus and the Inferior crus has disappeared along with the triangular fossa. The Antitragus has also caved in and the Helix is continuing to get thiner.
Creation of the ear

Week 5 - The eye

Labeled eye

This image above shows the main features of the eye with it parts colour-coded with its name.

Creation of the eye


This is the creation of my eye in Zbrush. The main brushes used for this was the standard brush, the dam standard brush and the clay build up brush. The sub tool was also used for me to add in the eyeball to the eye.
Villain creation - Brainstorming and mood board


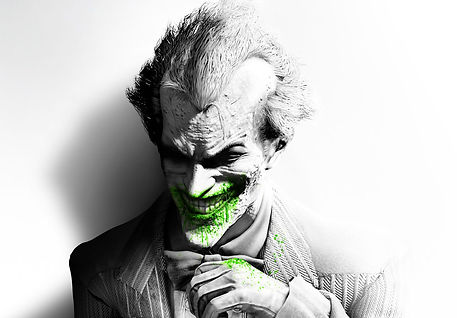
As shown in all these images most of the villainous features involved that these images all have in common are darkness around the eyes, long face, pointy chin, scars and big foreheads.


Week 9 - Fat

Orbital Fat

The orbital fat from this man is very extreme and clearly visible and also looks like it is slightly redding in colour.

This is another image of large orbit fat from the actor Danny Trejo. He has mainly placed underneath the eyes.
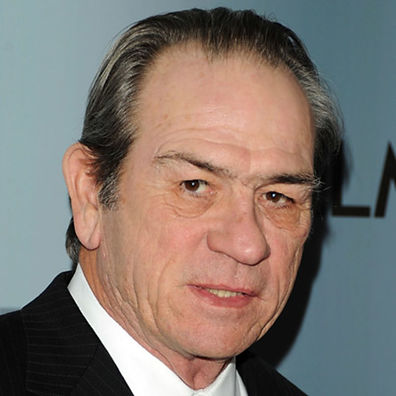
This is another example of orbital fat form the actor Tommy Lee Jones.
Labeled fat pads

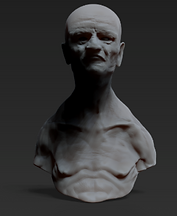
Designing a villain face

This is the start of me creating a villainous face on Zbrush. The facial features were added such as the eyes nose ears and mouth to the mode.
I used the dam standard brush to add a scar across the eye to give it that rough look.


The move tool was also used for me to create a slightly evil grin to make it feel more villainous.
I built up fatness on the cheeks by using the standard brush tool. I also used the dam standard brush to make the cheek fat pads look more prominent.

Weak 10 - texturing and workflow to maya


To add colour to the mouth i got an image of a mouth form the internet and put the file on brush. I then used the spotlight tool to fix the image and make the model in line with the image of the mouth. Once that was done i was able to colour it in.


Once that was done i was able to import the image to to maya. When in maya i readed the colour to the model and then redered the image as shown above.
Designing a villain face continuation.

Once i smoothed out the face to get rid of the hard edges form the template. I then used the clay build up brush to create thick villainous eyebrows for my character.
Once that was done I decided to add a bead to my character. This had to be done through the 'Lightbox' menu in the 'fibres' section.

Creating character expressions

This facial expression created above is a Happiness expression from FACS. To do this i had to use the Layers tool in Zbrush along with a range of Action units.
The first action unit was AU1 which was the Inner Brow Raiser.
The second action unit was AU6 which was the Cheek raiser.
The final action unit was AU12 which was the 'Lip Corner Puller'

The next facial expression i created was the anger/disgust expression. This also required a variety of action units to be used when creating this.
The first action unit I used was AU4 which was the 'Inner Brow Lowerer.'
The second action unit I had to create was the AU9 'Nose Wrinkler'
The next and final action unit I used was the 'Lower Lip Depresser' which is AU16.