CGi Foundations
Week 1 - Intro to Unity
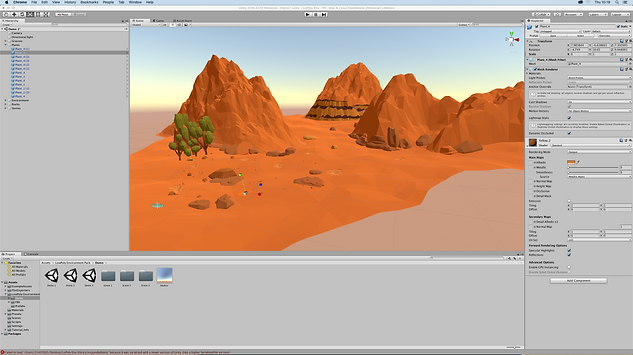
This was my first session and introduction session to using Unity. The above image is an already created scene in

This is the assets tab within Unity. The assets tab allows me to add and edit any form of environments to my main scene. This involves certain environments such as trees, mountains, terrains and rocks as shown in the screenshot above.

The screenshot above is an image of a world I created in maya. This was simply done by experimenting with the different environments from the assets in Unity. The move and scale tool was also used for me to create a range of different tree, rock and mountain sizes.
Week 2- Maya scene organisation, sculpting and displacement.

As a result of this this image which used to be a flat plane has now turned into a hill like environment as a result of the tools in the modelling menu and the use of soften edge in the mesh menu. .
From the modelling menu within maya it allowed me to create different looking form of environments.

This image was downloaded from the internet as it was going to be used as a form of terrain when brought in maya.

Once it was in maya we used the modelling menu to simply brush the image over the plane in maya. Once it the image was fully added to the plane it gave it rough rocky form of terrain. The move tool in the modelling menu allowed me to make certain parts higher than others creating more realism.
Week 3 - Alpha channel textures
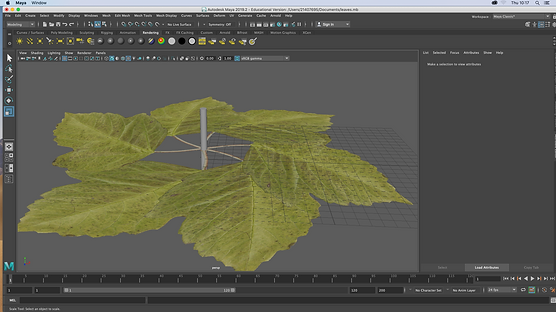
Within maya I imported and edited life like leaves and this was firstly done by adding and attaching the leaf alpha one to a plane. The one attached was then duplicated and rotated from the pivot making the leaves circle the stalk in the centre.

This image of life like leaves was also imported into maya which allowed us to experiment with more different textures in maya.
Assignment 1 -

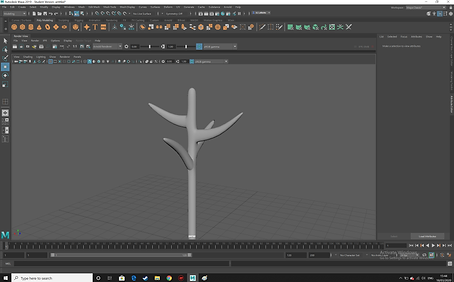
As shown in the images above I created a stalk of a tree by using a cube and scale it to create a thin stalk. I then added subdivisions to the so i can add in the branches. Once that was done I smoothed out the model to get rid of the blocky shape.

I then added a couple of spheres to the branches of the tree creating a low poly tree.


Colour was then added to the spheres to make it look more like leaves and the stalk was given a brown surface. The tree was then duplicated and scaled to different sizes to give it more a forest feel.

When I imported the image of earths close up terrain, I used the sculpt tool in the sculpting section to create hills over that rough terrain surface.

When I added enough hills I changed the surface colour to brown to make the environment feel more like mountains.

I then added the bunch of trees i previously created with my rocky terrain.

I then added in a few Arnold area lights to on the trees and rocky environments.

This is the rendered image of the lights on the trees and rocky surface.
Substance Painter

This is the skull model imported into substance painter ready to be textured.

I then typed iron raw in the material menu and dragged the material onto my skull model.

Once the iron raw material was on the skull model I went to the fill layer and made the base colour of my model red. I then right clicked on the fill layer and added a white mask.

The metal edge generator was then added to the fill layer making is mask the darken areas.
The mask effect was then reversed by me right clicking on the layer and clicking on invert mask resulting in the metal edge to be only present in the corners of the model.

Once the mask effect was reversed I created a new layer and then went to the alpha section. The base colour in my new layer was changed to yellow and I chose the arrow circle and place it upon the model.

I then created more layers and placed a range of different stamp patterns onto the skull model.

When I finished placing the alphas onto my model I clicked on the display settings on the top right and increased the environment capacity which conveyed the already present background.

From the top I opened the iRay renderer which rendered the textured skull model.
Assignment 2 - Materials and shading

This image of a small house is the 3D model I am going to texture in substance painter

Once it was imported in I went to the shelf and clicked on the materials section. I then clicked on the 'Wood American Cherry' material

A white mask was created in the wood material layer and I applied the wood texture to the roof of my model.

After that i created a new layer and from the smart materials section I used the 'wood ship hull nordic' material on my model.


Once the wood material was textured on the front side and back of the house I created a new layer and added the 'Concrete Bare' material to the long wall at the side of the house.

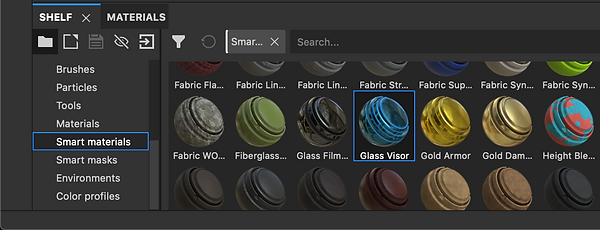
I then went to the smart material section, created a new layer and added the smart material glass visor section to my windows of the house. This created a refection effect.

Once i was finished adding the material and texturing the model, I went to the display setting on the right and and chose the Autumn Forest environment map. The environment opacity was then increased to make it visible.

I then clicked on the iRay renderer which redenderd the model of the house with the background as shown above.
Assignment 3 - Personal development
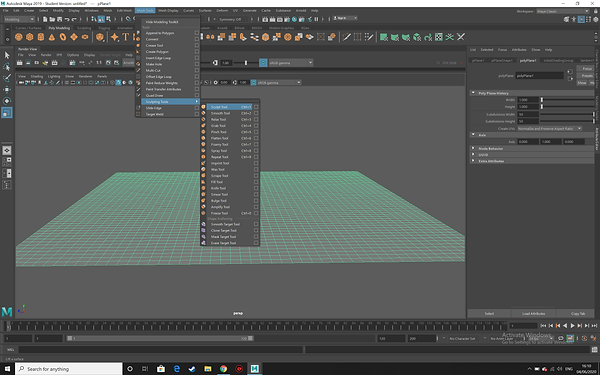
As shown in the image above I began by adding in a plane and created 50 width and height subdivisions on the plane in maya. Once that was done I wanted to start creating my ground environment so I went to Mesh tools -Sculpting tools and clicked on Sculpt tool.

By using the sculpt tool it allowed my to create a rocky environment conveying hills and mountains.

I then created a large gap in the middle of my environment as i wanted to add in a river flowing between the mountains
I therefore added in another plane and placed in the gap I created moving it slightly below the rocky environment.

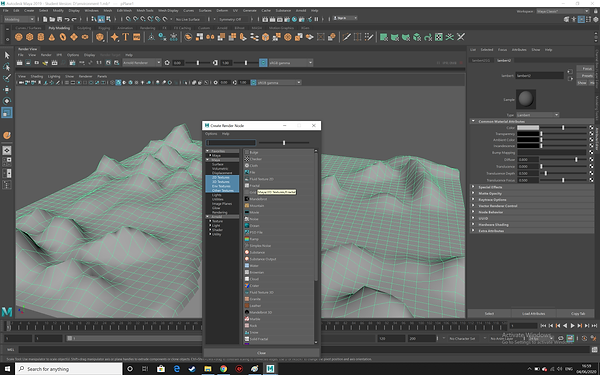
I then right clicked on my rocky environment, went to assign new material and clicked on Fractul.

Doing this gave my rocks and hills in the environment a more realistic feel as shown in the image.

Within the Fractul menu I opened up the Colour Balance section and changed the colour of my environment to brown. I also used the Fractul effect again on my environment to reinforce its realism.

The next step for my environment was adding colour to my river so I right clicked on the plane went to assign new material and clicked o n the ocean shader.
The ocean shader was now displayed on the plane creating a river stream effect.


I wanted to add so I imported an image of a Trex into substance painter and then exported it by going to file and export textures.

It was then saved in my drive so it can be opened in maya later.

Within maya I imported in the Trex by going to file and import.
I then added the texture to the base colour of the Trex. This was from the texture file that was saved in substance painter and I got it by clicking on file from the assign new material section.


The same steps I performed with the Trex from substance to maya was also used on this image of a house I previously textured and created for assignment 2.

After I finished importing the models I went to generate and then to brush in maya and then to the tree section. This allowed to import a range of trees into my environment.

As shown above and below the environment was populated with a range of trees by using and dragging the brush creating a more realistic environment.
